Saturday, March 31, 2012

NYC City Proof Extended Wear Lip Gloss Review!

So I was at my Target and was perusing the cosmetics isles as I normally do and I stumbled across these NYC City Proof Extended Wear Lip Glosses.  They CLAIM to last UP to 8 hours.  Well, as a lip gloss junkie- I decided to put these to the challenge.  I decided to put this on and take hour by hour pictures to see if they indeed lasted the length of time they claim- or if it was all just HYPE.  I picked up two colors- Blush Forever and Cherry Ever After.  The Blush Forever is a nice light to medium pink with almost a peach hint to it.  It also has silver sparkles in it.  The Cherry Ever After is a punchy red.  Its REALLY pretty.  Even though its red, its suitable for day wear since it sheers out.  It has a strange smell to it though.  Its like chemically sweet.  Like an artificially sweet Starburst- I still cant tell if I like it or not.
Cherry Ever After on the left and Blush Forever on the right

Cherry Ever After swatch

Blush Forever  swatch


So I put on the Cherry Ever After and took a picture to see how it was wearing and if it would indeed have some lasting power.  


This is the initial application
one hour later
Three hours later

So as you can see, after three hours it was pretty much done for.  I did have a bit of peeling of my lips- which is somewhat normal when you have something on your lips for that long.  My lips weren't stained though- which with red is nice.  I ate, drank and was merry!  I wanted to wear it as I normally would.  So does it last 8 hours- nope.  Is it a decent gloss?  Yeah actually.  Not too thick.  Not too sticky.  Decent color payoff.  I'm not running out to buy another one but I will definitely use the ones I bought.  Over all I would give it a B.    I purchased these for $3 at Target.


Friday, March 30, 2012

Gorgeous Hannah!


Ah, Prom....seems like just yesterday.  No, no it doesnt.  It seems like a LONG time ago!  :)


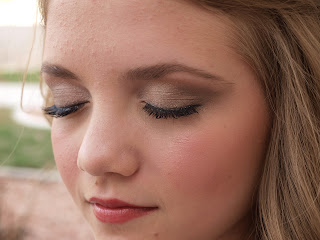
I had the HONOR of doing my sweet friend Hannah's makeup for prom today!  First of all, she is absolutely stunning- so she needed very little help.  She has an AMAZING bronze dress to wear tonight, so we wanted to keep everything completely natural and easy.  Take a look for yourself!  She is amazing and I am so glad I got to do this with her!


She is so STRIKING- isn't she?!


Maybelline 24 Hour Color Tattoos!!!

OK- So it is VERY VERY seldom that I find a product that I LOVE LOVE LOVE and I go back and pick up one of every color.  VERY SELDOM.  Well my friend...this is my new obsession.  It's the Maybelline 24 Hour Color Tattoos.  They are AMAZING.  I really cant say enough good things about them.  They are a really rich cream shadow.  They blend amazingly, they don't crease, they can be built up for a more potent color- I LOVE them.  I currently only have five of the ten they make.  I have Too Cool (white), Bold Gold, Bad to the Bronze, Tough as Taupe and Tenacious Teal- Don't you just love their names too?!  


Swatches of all the colors in moderate sunlight


The new addition to my obsession- Tough as Taupe!  My first matte.


I honestly use these everyday.  No seriously- everyday.  I use them alone for quick look, I layer with powder shadows, I blend them together, I use as an eye shadow base- you name it, I do it!  If you have ever used the MAC paint pots, these are the same thing.  Not color wise, but the idea is completely the same-and a FIFTH of the price!!  If I had to pick just one...I personally couldn't live without the Bold Gold.  I am enamored with gold though.  If I were recommending one to someone else, I would say the Bad to the Bronze or the Tough as Taupe.  They are the most universally flattering.  At $5 dollars, you should really consider picking them up- they will rock your eye lids in ways you never imagined possible.


Thursday, March 29, 2012

ELF HAUL!!

So Target sucks me in and holds me close....I LOVE Target.  It is really dangerous that they have one so close!  I went to go pick up some E.L.F (eyes, lips, face) products because #1 they ROCK and #2 they are a DEAL!  They dont have anything priced over $6!  Most items are $1 or $3!  I got a $3 flat kabuki brush, a $3 Mineral Infused Mascara and a $1 Clear Mascara and brow gel.  I am always surprised with how well their stuff works for such an affordable price!  I haven't used their Mineral Infused Mascara before.  It set me back $3 and the brush looks really similar to the L'Oreal Voluminous Million Lash that I heart SO much. I have told you all about my quest for great brushes- and my LOVE for synthetic brushes.  I dont think you should have to skin a badger for a makeup brush.  (Im dead serious- skin a badger)  I LOVE this brush- It's my second.  I wanted to pick one up to experiment with summer contouring.  New season- new fun colors! 


Here are all 3 of the fun ELF things I got!

A Silicon brush to keep from clumping and (hopefully) adding lots of volume!

I'm really hoping this one turns out!

Brow Gel Bristles

Clear mascara side

One side for lashes and one for brows

It's actually a good full size brush!

It's really densely packed too!

It's a great flat top brush


And SUPER soft! (and $3!!)
Have you ever tried ELF products?  What was your experience?  I want to try their HD foundation.  It's $6!!  People are comparing it to the Make Up For Ever HD foundation that is over $40!  I think that I will have to try it out after I run out of my favorite- Revlon Photo Ready.  Anyway- hope your day is full of sunshine and smiles!!

Wednesday, March 28, 2012

What to try?!

OK, so I have heard some "buzz" on some new mass market brands that I think I am going to try out.  I have heard a lot about the  L'Oreal Infallible eye shadow, the Hard Candy colored mascaras and the Maybelline Dream Bouncy Blush.  


I am excited to try the L'Oreal eye shadow #1 because I heart eye shadow- #2- it comes in some really awesome shades (GOLD?!  Me likey- Gotta have it!) and #3 its SHINY- and I'm like a toddler that way- I get easily distracted by shiny objects.  I have heard that these are best applied damp with a paddle style brush...we shall see.


Now the Hard Candy thing kind of threw me for a loop!  Back in the day, when I was in high school (dating myself now) Hard Candy was carried at Dillard's and was PRICEY for my high school self.  I remember drooling over their nail polishes and freaking over all their fun colors.  


WELL- now you can find Hard Candy at WALMART!  


Not only is it FAR more accessible, but its REALLY reasonably priced!  Seriously- $5 for mascara?!  Don't mind if I do.  Hard Candy is still geared toward the younger crowd who tends to be more experimental with colors....I may not be young, BUT I LOVE COLOR!  Seriously- look at that cobalt blue! I smile just looking at it!  Where do you wear cobalt blue mascara you may ask....EVERYWHERE AND ANYWHERE!  Be BOLD!


Finally, The Maybelline Dream Bouncy Blush....This one kind of threw me too!  I LOVES me some cream blush- I am ADDICTED to NYX in Hot Pink and Mac in Sweet William.  They look more natural and dewy than powder blush.  They do take some getting used to....but back to the point- Maybelline.  OK- so the concept may be a little kitchy- its a cream blush with a spongy texture.  I have heard that these are fun though.  I think the coral shall be mine as coral and orange are "THE COLORS OF THE SEASON".  (And it's my 4 year old's favorite color- he is VERY vocal about how I choose to style myself)  


I'm sad to let go of plum lipstick and navy eye shadow but I'm excited for spring.  What are YOU trying for spring?  A new color?  A new formula- like tinted moisturizer rather than foundation?  I tend to lighten up color wise but I keep my basics generally the same.  I'm SO excited to rock posy colored lips and corals all season long...along with flowers popping up and the sun shining more.  I'm also looking forward to short sleeves, less layering and not having to pack 75 blankets for a trip to Walmart...for the baby, not me.  What would YOU like me to try?  What products have peaked YOUR interest?  Let me know!  Comment below!


Tuesday, March 27, 2012

So WHY Budget Beauty Mama?!

Kind of a strange name to choose for a beauty blog- especially for someone who is somewhat experienced in the beauty world.  Well- I have spent the last 6 years having and raising three amazing children.  Guess what?  KIDS ARE EXPENSIVE!  No really, $45 for a box of diapers and $35 for a can of formula?!  I used to drop that kind of cash on a blush or on an eye shadow pallet....not so much any more.  


The good news is that many drugstore or mass market brands have really stepped up to the plate in both selection and quality.  12 years ago when I started out in "the biz" MAC cosmetics was the only brand with knock out pigmentation, a range of finishes and colors that would make your mind boggle.  Now, you can really find some fantastic stuff if you do some trial and error.  SO....In comes- ME!  I have the experience of technique, color work and education mixed with the search for awesome brands that duplicate your desired look for less!  Who doesn't want that?!  


The most commonly asked question I get asked is:  "How did you get involved with this?"  The answer is a little more emotional than some might imagine.  I actually started in FRONT of the camera.  I was a model and beauty pageant queen.  As I grew up- I got bigger- like plus size.  Back in the 90's- that wasn't as fashionable as it is now.  So....I got hooked on eye shadow and lip gloss because- no matter how big you are- they always fit.  It grew into a love- I could transform myself with cosmetics.  It wasn't just an external transformation- it was internal.  


I gained a confidence within myself because I found something that I was not only enjoyed- but I was pretty darn good at!  At the end of the day, at the end of my workshops and the end of each blog post- that is what I want for YOU.  I want YOU to find a confidence within yourself- a skill that you have learned and that can help you feel AWESOME.  I don't care if you are 15 or 75, a size 2 or a size 32, blonde or brunette- I want you to embrace your beautiful face and your awesome features and learn how to showcase them to make them SHINE!  

Monday, March 26, 2012

Mascara Madness!!!

OK, So there was a funny article on yahoo.com (click HERE to link) about the all time best mascaras.  I somewhat laughed at their selections...seriously who do you know who is paying $49 for a tube of mascara at Saks?  Uh, not me.  So I thought that I might do: (dun dun dun dun) Kristen's Mascara Madness!  My top mascara pics across all budgets.


Mascara is a lot more than just black or brown crap that you smear on your lashes.  It can transform you for the good or the bad.  You should ALWAYS look like you have more than five lashes- always.  You shouldn't wear black flakes of mascara all over your cheeks either.  That's irritating to your eyes and it just plain bugs.  Honestly- I HATE paying big bucks for mascara.  Why?  Because its the thing you are going through the fastest and (hopefully) throwing away the most.  At the MOST you should use your mascara for 12 weeks.  THE MOST!!  Think of all of the bacteria you are pumping back into your tube daily....oh and don't pump- swirl your wand.  It will keep extra air out so it wont be drying out so quickly.


In alphabetical order (since that's how my computer lined them up):


Benefit- They're Real....I LOVE the tip of this wand- every single lash gets attention

Covergirl Lash Blast- I like BUT it flakes if you touch your eye

Lancome ROCKS mascara- and Hypnose is my favorite....if only it were cheaper

Loreal Volume Million Lashes- My new must have three tubes on hand at all time obsession LOVE LOVE LOVE

Mary Kay Ultimate- I really like!  I like that it tapers really well at the tip so you can get all the tiny inner lashes 
Maybelline Falsies- I REALLY like for the first three weeks...then it dries out  and isn't usable any more :(

Good Ole Maybelline Great Lash- This was my first mascara and I'm sure yours too.  Can't go wrong with it
And there you have it- my top seven....what an odd number.  What's your favorite mascara?  What are you willing to shell out big bucks on?  Would YOU buy a $49 tube of mascara at Saks?

SO AWESOME!!!

OK, so last Friday night (the 16th of March) at like 8 PM I get a phone call from the ever awesome Carrie Butler of Carrie Butler Photography.  For those of you who aren't in the know, she is an amazing, amazing, amazing photographer that I attribute every decent picture of me in the last 6 years too.  No seriously, people walk in my house and are awed by the gorgeous photos, and I have to tell them that they are all Carrie's fault!  (And she doesn't photo shop- she is just THAT good!)  Anyway....She asked if I was available to do a photo shoot and film campaign for a new boutique that is opening in Utah County called Clique.  I was hesitant because  my parents had JUST flown in that day and we had plans....but not until later- so we figured it out.

What an AWESOME experience!  Seriously- there were 7 or 8 models, each a different ethnicity, a different height, different modeling backgrounds- what a blast.  It was such a great atmosphere too.  Everyone was just excited to work- and everyone got along just great!  So yeah- awesome!  There are pictures to come- I want you all to see the gorgeous girls I had the opportunity to work with both in front of the camera and behind the camera.  Oh!  That's where the picture of me on the front page of my blog-a-roo came from!  (she does good work-huh?!)

Sunday, March 25, 2012

BEAUTY WORKSHOP!

OK, So to celebrate this new Beauty Blog, I have decided to try something new.  I will be hosting my first Beauty Workshop out of my home on Saturday, April 7th at 1:30!  I will only be taking 5 people for this initial workshop as this will be an endeavor that I have not done since having children.  We will be covering both a daytime natural look and an evening more dramatic look.  You will be working on yourselves and practicing with someone else as well.  I will also be working one on one with you.  You will also go home with everything that we covered- so no worries if you forget something.

The cost will be $25 per person for this workshop.  It MAY change next time around depending on how this initial workshop goes.  The $25 will need to be paid up front to hold your spot and is non refundable.  I know I live far away from some of you- so if you have a party of 5, I will come to you.  You need to bring your makeup bag- whatever you have is great.  No need to rush out and buy anything.  I will also take photos of your different looks so you have reference pictures for the future.  (you can also use them as fb photos- *wink*)  What a fun girls night in!  Looking forward too seeing who comes!

Saturday, March 24, 2012

The Mommy Mani

So as you all know by now we are insanely busy at our place with our newest addition!  I swear that sweats and tanks have become my wardrobe and a shower alone is a luxury!  So finding time to do my nails is basically out of the question.  I have had a Shellac manicure done in the past and I LOVED it but it took 1 hour no including drive time and it cost me $35.  I loved the gel soak off manicure though because my polish never chipped, never lost its luster and didn't damage my natural nails.  I have my hands in water cleaning and cooking and washing my hands a million times a day due to having a new little one- and it lasted like crazy!  SO- I am writing this post because I have fallen in LOVE with a new product and I have to spread the word.
I was walking my local Walmart and found a whole starter set of DIY gel soak off nails called Sensationail.  Its the same process that the professional used on me and I decided to pick it up and give it a try.  I chose the Scarlet starter set that had an LED UV lamp, nail cleaner, primer, gel base and top coat, colored polish, nail files, orange stick and lint free cleaning pads.  I picked it up for $50 so I figured that if I had two mani's it would more than pay for itself.
Verdict you ask?  Love, love, love, cant believe I ever lived without it!  I cant believe that I can have the same results at home that I had with a professional mani!  I did the full regale the first time and soaked the cuticles, buffed the skin and everything.  It took me about an hour as I was trying it out for the first time and I was unsure if I was following the instructions properly.  It seemed too easy and I couldn't believe that it literally took 10 minutes to paint and dry my nails.  Not just to a soft finish that I have to be careful with but to a rock solid shiny smooth nail!  Any and all mommies who want to try to maintain manicured nails without weekly pricey visits or want to have great results need to pick this up!!

Day 5- Goodbye Groucho Marxs

OK, So I am INSANELY busy with sick kids and a severely nasty house- so this is going to be a short but VERY important post-a-roo.  Eyebrows!  Your eyebrows define your eyes, think of them like a frame for your windows to your soul.  I know- deep huh?!  If you arent doing anything with your eyebrows- you are missing out on a great opportunity.  If your eye makeup is phenomenal and your eyebrows aren't right- you wont make the impact that you are trying to. 
First off- I would suggest seeking the help of a professional to begin with.  Look for a waxer or threader that specialises in eyebrows.  When you go in- know that the first time should take around 30 minutes to get your eye brows perfectly sculpted.  When you go in- tell them that you want a natural arch shape.  That is going to be following the natural arch of what your eyebrows naturally do.  They should make an arch shape that gently thins out at the ends.  You should not have lines for eyebrows or you run the risk of looking permanently surprised... unless that's what you are going for.  If you have long eyebrows like I do, have them trimmed.  If you have very thin eyebrows- you still should have them shaped professionally.  When you have them shaped- it gives you a stencil of how you can fill them in.  You can have it done professionally once and then maintain them with a sharp angle tweezers for up to six months!  (Just a hint- take your tweezers in your car with you.  I always notice stray crazy brows in the sunlight of the car.  I usually will do it when I am sitting outside my daughter's school waiting for her to be let out.  Just don't tweeze and drive!)  If you choose to maintain them yourself and you have long brows- remember to keep them trimmed- but be judicious with the trimming.  It's better to take your time and trim just a few hairs at a time than to make a long snip and take off a chunk of your brow.  (yeah, I did that when I was 15 and looked like Vanilla Ice)
When chosing a eyebrow product, you want to keep a few things in mind.  Powders are easier to blend and come in a larger rainbow of colors.  They tend to look more natural.  ALWAYS choose a matte powder.  You don't have to choose an eyebrow powder, you can choose a shadow as long as it matches.  Pencils are a great option but you still need to blend them out to look natural and so you will still need a brush.  Pencil is MUCH harder to blend out- but it stays put a lot better.  You NEED asynthetic angle tip brush to do your brows no matter what you choose to use.
When choosing a color, make sure that you stick to your natural color or you can even go a shade or two darker which will define them really well.  That is super important if you have really light blond brows.  There is a "rule" that you should never use black to fill your brows but guess what- mine are black.  No really- naturally black.  So espresso looks ridiculous on me- so choose the color that you feel best suits you and not what the "rules" say.  If you have long, curly or sometimes unruly brows you could benefit from using a clear mascara or brow gel.  Brow gel is great for keeping your brows looking really manicured and will also help powders last longer.  Cover Girl makes a good one for $4!
As far as technique goes- it really depends on the shape of your brows but the way I tend to fill in brows on myself and clients is that I start on the top side of the arch.  Your brush will have the most product in it and you want to start where you want the most focus- so start in the middle.  I then use tiny little brush strokes and work only the top line all the way to the end.  I then do the same exact process only on the bottom line of the brow.  Then with the remaining product left on my brush- I define the parts the closest to the middle of my face and fill in.  Your brows are generally fuller and thicker there so you really don't need a ton of definition.  Again- it depends on your individual shape.  Set it with some brow gel making sure to brush up and out and POOF!  Your done! 
If you choose to use a pencil make sure it is sharpened EVERY TIME you use it to get a razor thin line.  Work your top line first working in light tiny strokes and then do the bottom.  At this point put your pencil away and grab your brush.  You want to go back over your work taking care to blend it in really well and then use the leftover on your brush to do the rest of your brow.
One of the really fun hot trends right now for the super adventurous is to fill in your brows with a damp brush and a VIVID color like purple, blue or green.  It is a super fun look and looks really awesome with an understated eyelid.  Not exactly something that you would wear to work but fun for going out!  I LOVE Sugarpill cosmetics and they make some AWESOME matte vivid colors.  They also have some pictures on their site of the vivid brow- check it out and let me know what you think!

Day 4- Stop, I'm blushing....

This summary is not available. Please click here to view the post.

Day 3- Because You're Worth It

Another thing that I hear from fellow mommies is- I just don't have the time to put on makeup.  This makes me sad.  As mommies and wives, we make time for everyone else and fail to remember to take care of ourselves.  I don't care if it's makeup, doing your hair, showering or sipping your favorite beverage, take some small moments daily for yourself.  You will be surprised how much better of a mommy you will be if you take those small minutes.  When I take the time to do my makeup I feel more confident and I think its important for our kids to see us as the amazing confident beings that we are.  By no means am I saying that we should wrap our self confidence around what we look like but I know that when I feel like I look better, I feel better.

Ok, stepping off of my soap box today I want to talk about one of the most important things for your makeup arsenal- BRUSHES.  Think of painting a home or a canvas.  You wouldn't do it with a small scratchy sponge- so why are you doing your makeup with them??  The brushes that come prepackaged with your makeup should be immediately thrown out or given to a small child to play dress up with.  They will never provide you with great even coverage, they are not large enough and they can sometimes irritate your skin.  Get rid of them.  Now!  In order to have the look you want- you need the proper tools to do the job.  Again- you dont have to go out and spend hundreds and hundreds of dollars on pro makeup brush sets.  There are a few brushes that you should absolutely have in your kit.  I will let you know some optional ones as well.
MUST HAVESA large fluffy face brush that you only use with your powder or powder foundations.  You can use a kabuki style brush too- just make sure that your brush is fluffy but dense with bristles.

A large fluffy brush for bronzer or blush.  Don't mix up the brush that you use for your powder or you could potentially be making your whole face bronzed or blushed- which you don't want.

A large flat bristle dense eye makeup brush.  It should have some curve to the edges to blend out.  This brush should be firm but soft.

A large very fluffy crease or blending brush.  It is specifically used for creating a perfect crease or blending out your eye shadow.  This one is my personal favorite :)

A small stiff  bristle angle tip brush. This will help fill in your eyebrows, create eye liner or you can even use it for a perfect line on your lips.  I wouldn't use the same brush for your eyes that you use on your lips....ewwe.

A foundation brush.  The style of brush you need depends on what formula of foundation you use.  If you are using a mineral or powder foundation- a fluffy complexion or kabuki style is best.  If its liquid or cream- stick with a duo fiber brush.

OPTIONAL BRUSHES
A smaller flat "c" shaped eye brush.  It should basically be a smaller version of your large flat brush.  Its great for adding high lights along your brow or your inner corner.  I prefer this brush to have a slightly pointier tip than your large flat brush....personal preference of coarse.

A pencil or smudge style brush.  This is a great one for a smokey eye.  It helps place and smudge out color under your eye, as liner or in your crease area.  This is another favorite of mine.

A "spoolie"  is technically not a brush- picture a dry mascara wand.  Its great for brows.  You can brush your brows out and blend the powder in for a more natural look. 

A lip brush is an absolute must have IF you wear lipstick.  I only put it on the optional brushes because I know most moms don't wear lipstick daily.  I would stick with either an small angled tip brush or a small thin synthetic fiber brush.  If you are putting one in your "to go" makeup bag- get a retractable one.  This keeps it clean from the debris floating around in some of our purses. (not MINE of coarse...yeah)

THAT'S IT!  If you don't typically wear makeup or own any brushes, six sounds like a lot- but I promise its not that bad.  Don't get overwhelmed thinking that you need to purchase a huge 30 piece rolling bag set.  Leave that for professionals that actually NEED that many.  I would suggest a case though- its better for the brushes not to get demolished from rumbling and tumbling around.

When making the decision on a type of brush to buy- there are only a few things to consider.  FEEL the brush.  If it scratches your hand- imagine what it will do to your face.  Make sure that it feels nice and dense.  and don't be scared to rough the brush in your hand a bit to make sure it's not going to shed all over you.  There is nothing worse than doing your makeup and looking down to see a hairy chest. :)  If you are starting out and are on a tight budget- I say go for the e.l.f. brand.  None of their brushes are over $3 and they are actually ok.  If you already have a great brushes and you are ready to upgrade- I would suggest Sigma brushes without a doubt.  They are really well made by hand, they are all vegan and I cant say enough good things about them.  They run from $9 to $19 which is a STEAL compared to Mac brushes.  You wont regret it- and your not skinning a badger for your makeup brushes!!

Once you have your brushes, you must remember to take care of them.  Store them in a case of some sort and don't forget to CLEAN THEM.  You can get away with just rubbing them gently on a baby wipe (a MUST for eye brushes- not so much for powder or blush) daily after use.  Twice a month- you gotta clean those babies out.  Think of all the bacteria that can get trapped in there.  If you let it just sit- bacteria is going to grow and then you are wiping it all over your face- EWWWEEE!  So you can youtube for an instructional lesson on how to wash your brushes if you need to SEE it done.  Basically, you are going to use a sink with warm water, rinse each out thoroughly.  Use either a baby shampoo or another gentle soap and agitate the bristles.  Rinse them back out until the water runs completely clear.  Reshape the brushes and let air dry COMPLETELY before you use them again. 

And there you go- all you could ever imagine knowing about brushes!  Whats your favorite brush?  Where do you buy your brushes?  Do tell!!

Day 2- Give good face

So yesterdays post was how to select a great foundation.  Today I want to move on to how to do a flawless face with foundation.  The first and foremost important thing for foundation is skin care.  The basic routine for skin care should include, OIL FREE eye makeup remover, a gentle cleanser, once a week exfoliation of your choice, and MOISTURIZER.  The most important thing to remember is consistency (twice a day!!) and let the products that you use do their job. 

The #1 most awesome-est cleaner that I recommend to everyone is Cetaphil.  It is SO gentle and calming to skin.  It does a great job and you can find it anywhere and for a really reasonable price.  If you find yourself having issues with large infected blemishes another product that is awesome is Hibaclense.  It's an anticeptic and antimicrobial soap.  Leave it on your skin for a couple of minutes to let it do its job before you rinse.  The most important thing with any product for acne is that it is designed to be drying- so make sure you replace the moisture.  If you are really super invested in your skin care regiment- you NEED a Clarisonic Beauty Brush.  It's made by the same people who make Sonicare toothbrushes.  Think of how clean your teeth feel after using a Sonicare toothbrush and imagine how awesome your skin would feel.  It also eliminates your need for exfoliation as it removes the loosened skin cells from your top layer.  I would suggest you start out with only using it once a day though- especially if you have sensitive skin.  I sound like an infomercial- but I tell you- its a product that I really stand behind and love. 

I am not crazy about toners.  I know a lot of people who swear by them but I have never had awesome luck with them.  If you are doing a great job cleansing, you don't need an alcohol pad on your face to kill bacteria.  Most toners are super drying too and can sometimes do more harm than good.  If you are in love with your favorite toner- than by all means stick with what works for you.  If you aren't using one now- I wouldn't go out of my way to find one.  I would invest the money elsewhere. 

MOISTURIZER!!!!!  This is a subject that I cant stress enough.  If you aren't moisturizing- you should be.  I don't care if you have oily skin, dry skin, combo or normal skin- you should be moisturizing.  It is the single most important part of having healthy skin.  Your makeup will only look as good as the canvas its going on.  Makeup is made to accentuate and there is only so much that cover up can do.  If your skin is wrecked and you are caking on the cover up- it will look exactly that way.  A wrecked canvas with a layer of spackle.  Not a pretty picture- huh?  You should have a light daytime moisturizer with SPF, a nighttime moisturizer that is more emollient and don't forget an eye cream.  A good eye cream can really plump up those crows feet and fine lines.  Not that ANY of us have those.... 

I have had the opportunity to try a lot of skin care over my years and the one that I have been the most impressed with is- AVON!  Its not just for your grandma anymore!  I LOVE the ANEW line.  Experiment with the different formulas though.  I actually use the gold line which is made for women over the age of 50- and I am only 31.  I like it because I have deathly dry skin and this line is ULTRA hydrating.  (If you need the name of an awesome rep- let me know.) 

Once you have your gorgeous canvas prepped- you can go for a foundation primer.  What a primer does is function as a silicon layer between your makeup and your skin.  It makes your foundation go on smoother and generally it will make your foundation last longer.  You have many choices for foundation primer.  E.L.F. (eyes, lips, face- sold at Target) makes a pretty ok one- FOR $3!  If you are strapped but want to try one out- give that one a try.  Covergirl makes a really good one in the $10-$15 range. My FAVE FAVE FAVE that I RAVE RAVE RAVE about is Smashbox Photo Finish.  It's ridiculously amazing- and it comes in color correcting versions that are out of this world.  Be warned- it's a pro product with a pro price tag at around $35.  Keep in mind you use a teeny tiny dot- so it will last a year or so.  You don't HAVE to use one- but I love it- ESPECIALLY if you are using a mineral foundation.  You will look flawless.

What type of foundation you choose is totally a preference thing.  Once you have found the type you heart and that works for you, you have to apply it correctly.  Mineral foundation or powder foundation is a no brainer. I'm sure we have all seen the infomercial on swirl, tap, buff.  Its a pretty universal method when it comes to mineral or powder foundation.  If you think its not going on evenly enough, make sure your skin is nice and moisturized and make sure your are buffing really well.

If you are using liquid or cream foundation- you can use your fingers, but I prefer a stipple or duo fiber brush.  e.l.f. makes a great one for- $3 that you can buy at Target.  I put a couple of drops or a tiny pea size drop on the little pad on the back of my hand/ bottom of my thumb area, lightly dab my brush in it and buff on starting under your eyes and working out to your hairline, then your jawline.  Make sure to buff in small circles and blend, blend, blend.  That is the secret to looking like you are naturally flawless.  You want to look like you have great skin, not like you have a great foundation on.  You can see it done all over youtube if you need to SEE it done.  I don't really care for the flat synthetic foundation brush that you see sold.  I find it harder to blend evenly and you REALLY have to wash it after every use. 

If you are using a cream or cream to powder foundation like Mac Studio Tech or Covergirl Ultimate Finish- I would suggest a makeup sponge.  Again, start under the eye and work your way out.  Cream and cream to powders can be a little difficult to use in my experience because they dry out somewhat quickly and you really need to buff and blend.  Thicker formulas tend to sink into pores and can accentuate lines and wrinkles- be aware of that or use a formula like Covergirl Simply Ageless Anti- Aging Foundation that has a primer built in. 

Concealer.  This is the single most incorrectly used and incorrectly purchased product I know of.  Concealer is meant to help cover blemishes- whether they be acne, dark spots, under eye circles or scars.  What you are trying to achieve with concealer determines the type of concealer.  The wrong formula can cause that little blemish to become cakey or even accentuate it more!  There are only two concealers that I ever recommend. They are Dermablend or Cover FX.  The reason that I ONLY recommend these is because they are the ONLY concealers I have every tried that actually do what they are meant to do without looking obvious.  They are in the $20- $25 range but I would pay double for them.  They are THAT awesome.

When applying concealer- you want to put your foundation on FIRST and then put on your concealer.  This is because #1- you want to see if you even need concealer after your foundation did it's job.  If it doesn't look the way you want it to- then you turn to concealer. You don't want to rub off your concealer with your foundation.  Start with the teeniest tiniest mini droplet and pat, pat, pat it on using your ring finger.  You can use a brush too but I think fingers work better. 

After all your foundation and concealers are on and you look like a primed and perfect canvas- you want to make sure it stays that way.  You NEED to set it with powder to keep it in place.  You can choose a loose or compacted powder- either work.  You can choose translucent or slightly pigmented powder.  The only things I would stay away from are highly pigmented or colored powder and super expensive HD powder.  Pigmented powders will instantly make you look cakey and unless you are on television- you dont need HD powder.  If you are flat flat broke and need something to get you by for a bit, you can even use a dash of corn starch on a fluffy brush.  Oh yeah- make sure you are dusting your face with a fluffy rounded edge brush.  Again, if you don't have a fluffy face brush and your on a budget, try e.l.f. for $3.

Phew, that was a bit longer than I anticipated.  Whats your favorite product?  Any specific questions I can answer for you?

Happy Makeup-ing!